Native Solidity Indexer using Ghost CLI
Writing Data Pipelines in Solidity with Ghost 👻

Ghost recently announced their alpha CLI for writing your blockchain data indexer directly in your IDE using Solidity. Analyzing blockchain data requires a lot of context switching. Swapping between Solidity, SQL, Javascript/Typescript, and Python can get tedious. This feature is a welcomed addition to their suite of on-chain data tools. This might be the best feature to date, integrating directly into your development flow. You can fork, modify and deploy existing public GhostGraphs as well.
I’m going to take a tour through creating a GhostGraph with their new CLI. This will be focused on how I would go through the full stack of building my contract, indexer, and dApp frontend.
The ability to deploy indexers in Solidity within the same application will demonstrate the simplicity. I am going to take you through the full flow of writing my contracts and indexer in Solidity. Keeping a single unified flow while minimizing context switching.
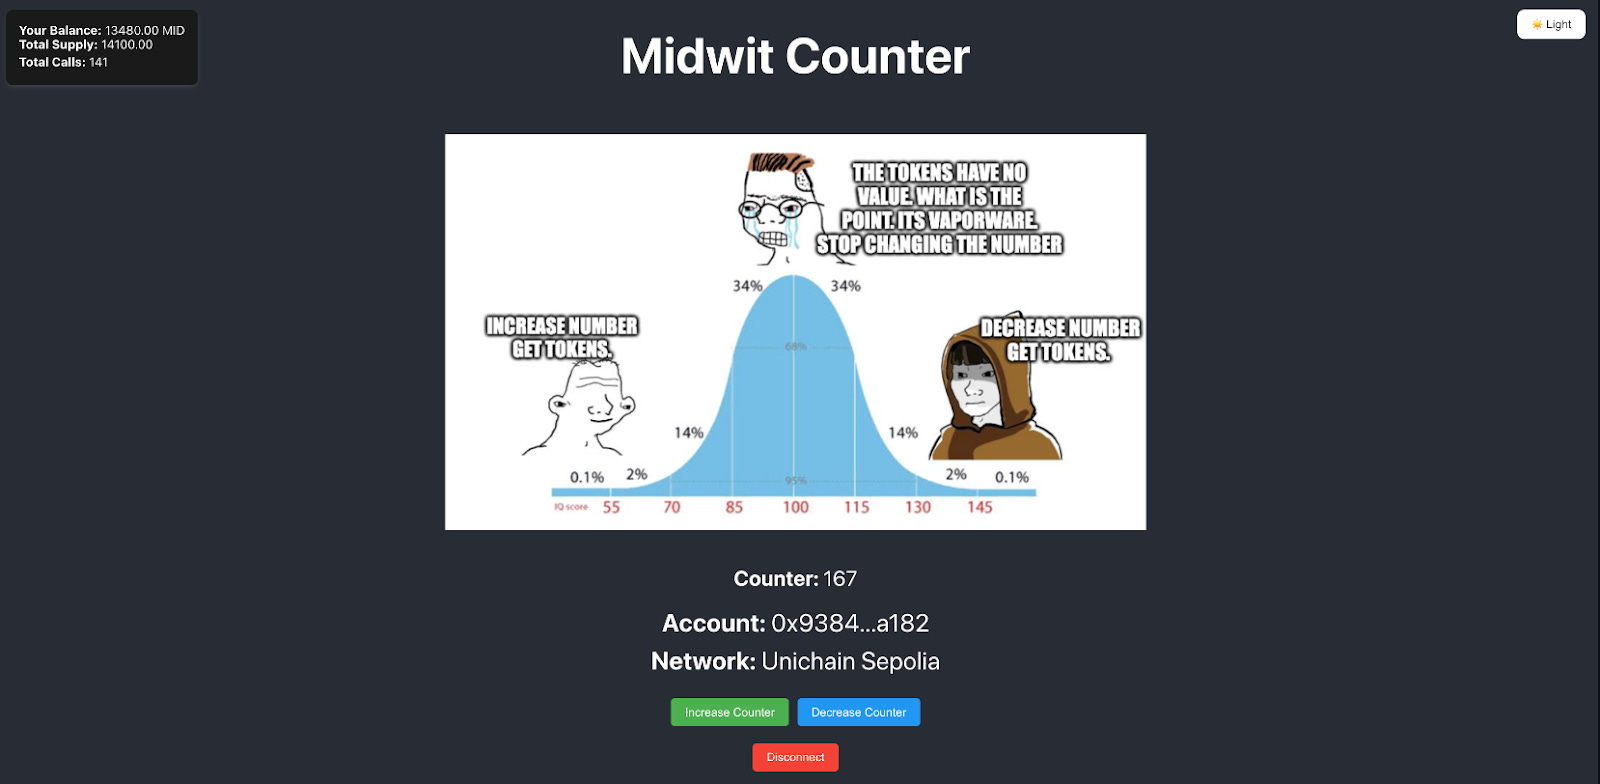
Our dApp
Our dApp will be a basic counter application that transfers tokens to the users every time they increase or decrease the counter. You can check out the entire repo here:
We are going to be using Foundry to develop our smart contracts and unit tests, and Ghost for our indexer.
On the indexing side - I want to keep track of the transfers that occur, the change in state of my counter and some other metrics. We will deploy our contract to an L2 to save on gas fees. In this example we will be building everything on Unichain Testnet (so make sure you get some testnet ETH for deployment.
Contracts
Before we can build our indexer - we need our contracts. When we run forge init contracts we get some boilerplate contracts from Foundry. Let’s just use the contracts that we have in place for now and modify them a bit. I am going to import the Openzepplin contracts so we can use a few of them in our contract as well. Lets install the openzepplin-contracts forge install OpenZeppelin/openzeppelin-contracts.
We can import the ERC20 contract and ownable - Add some custom events, deploy and start our indexing.
Ok so now we’ve got a basic contract that transfers tokens every time you increase or decrease the counter. The owner of the contract can reset it. This should give us plenty of events and data to index.
Deploying & Calling our Contract
Let’s deploy our contract to Unichain Testnet. To do this we will run the following command in our contracts folder.
forge create src/Counter.sol:Counter --rpc-url $RPC_URL --chain-id 1301 --private-key $PRIVATE_KEY
(You can set your RPC_URL to https://sepolia.unichain.org)
Our contract has been deployed at 0xEC87E4C8Ac38Ff4ECe7D0E36CdBDF42c39FcE903

I have added a few commands in the readme to allow us to make some requests to simulate a few transactions as well. This will help create some data for indexing with GhostGraph.
Indexing
Let’s start by creating an account at tryghost.xyz. Once you’ve created your account we can set up your API key. Head to the GhostGraph section of the app. Click Indexes and select API Key.
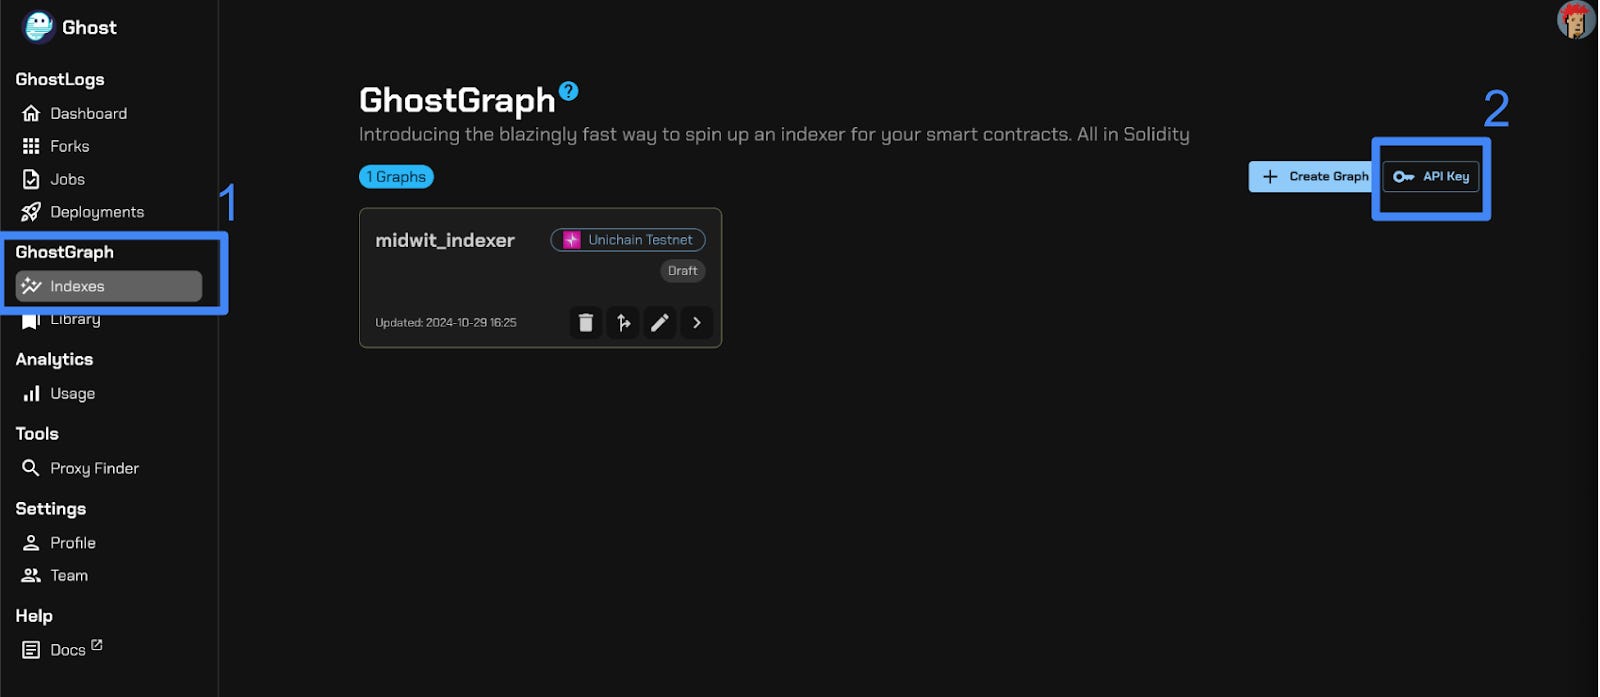
Then generate an Admin Key:
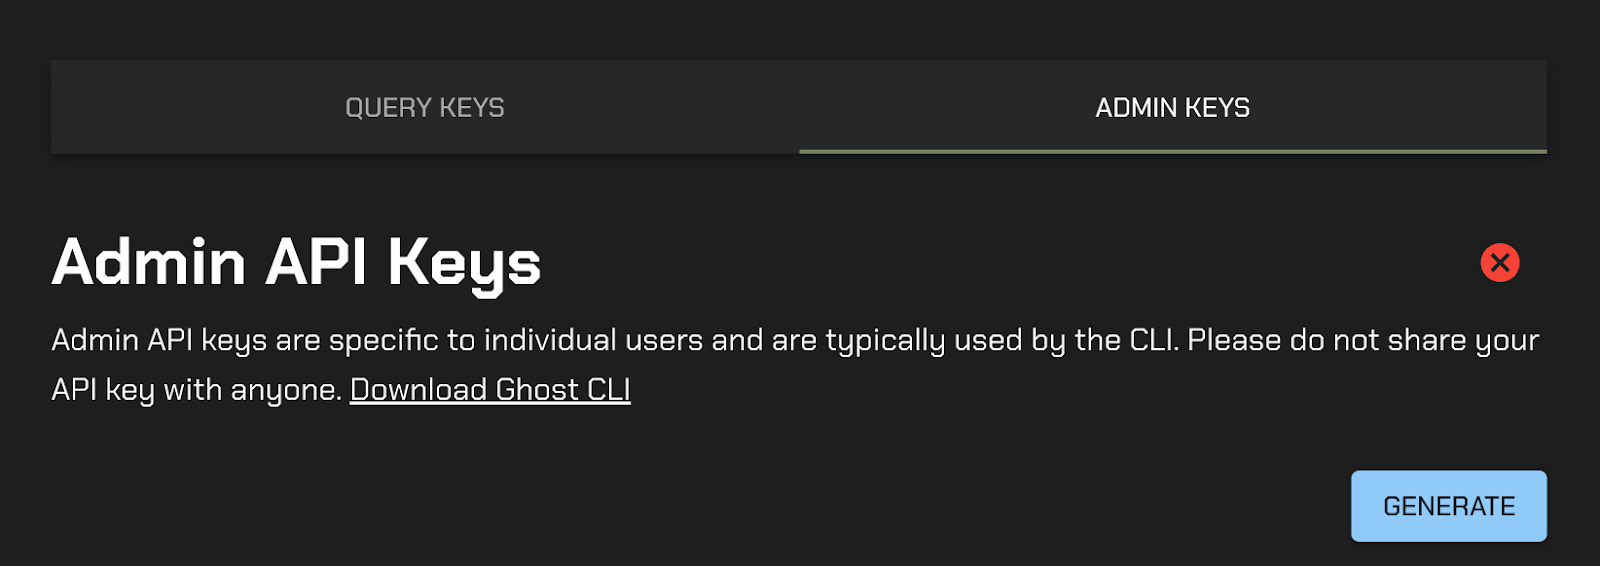
We have our account and our API key - lets start to create our indexer. First we need to install the Ghost-CLI. Click the link and follow the instructions in the README to get set up. I’d also recommend that you keep the Ghost Docs open for reference.
Once you have the repo cloned, built and your API key configured we can start to build our indexer.
In our project repo we can run ghost create --chain <chainId or slug> <directory> and it will create the scaffolding for our project.
Running ghost create --chain 1301 midwit_indexer. Now in my midwit_indexer directory I have all the basic information I need to start creating my indexer.
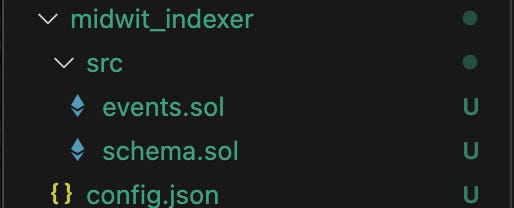
Next, we want to open up the events.sol file. Here we will fill in the events that our contract emits that we want to build into our indexer.

Ok - I have all the events from my contract defined in my events.sol file. Next we move the schema.sol file. Here we I’ll create the schema and relations between the events that I want to index.
For this example I will create a few schemas that will allow us to index the data and build the relationships between my schemas.
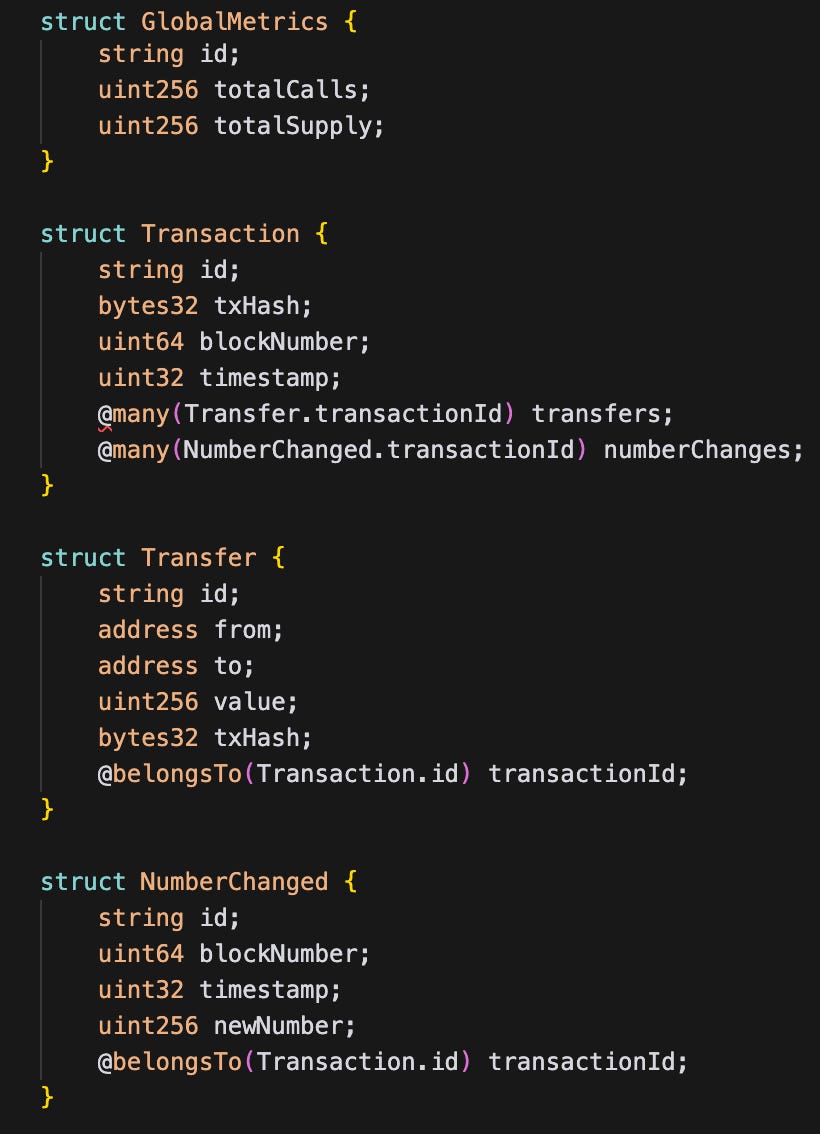
We can create relationships between our schemas using @belongTo and @many .
I want to create a few structs that keep track of the total supply of tokens, how many times my events get emitted, monitoring all our token transfers and the change in state of our variable in our contract.
Once we have the schema.sol file completed we can run ghost codegen. This will build out all the information we need. It will import some helper files from Ghost and it will also create the template for our indexer.sol file.
Opening up our indexer.sol file we can see that it generated functions for each of the events in our events.sol. We can then populate the indexer.sol files with our logic for how we want to handle each event and populate the schemas we defined above.
First begin by populating our `registerHandles()` function. Registering our contract tells our indexer what contract address to watch for. Also, I am going to delete the functions that handle events that I am not super concerned about at this time (ownershipTransferred, approval, numberReset).
My indexer.sol file will consist of 2 functions that will be responsible for populating my schemas. The first function will watch for all the `numberChanged` events.
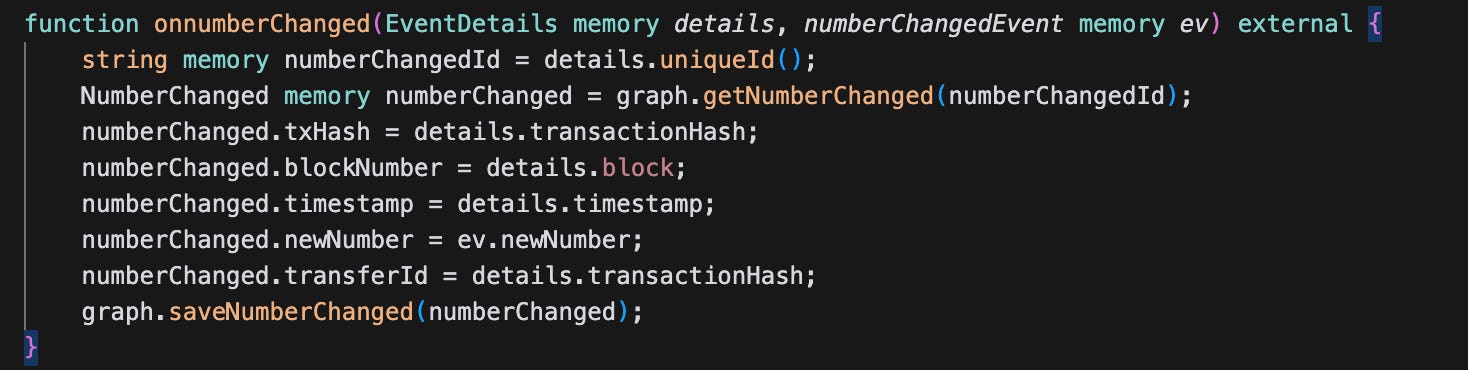
This will be used to populate my NumberChanged schema. So now, every time the numberChangedevent is emitted I will get the latest data and add it to our schema. GhostGraphs have some nice helpers that allow you to use the `details` to get additional information from the event such as the transaction hash, timestamp, blocknumber, emitter, and the log index.
Next we will write our indexer to handle our transfer events.
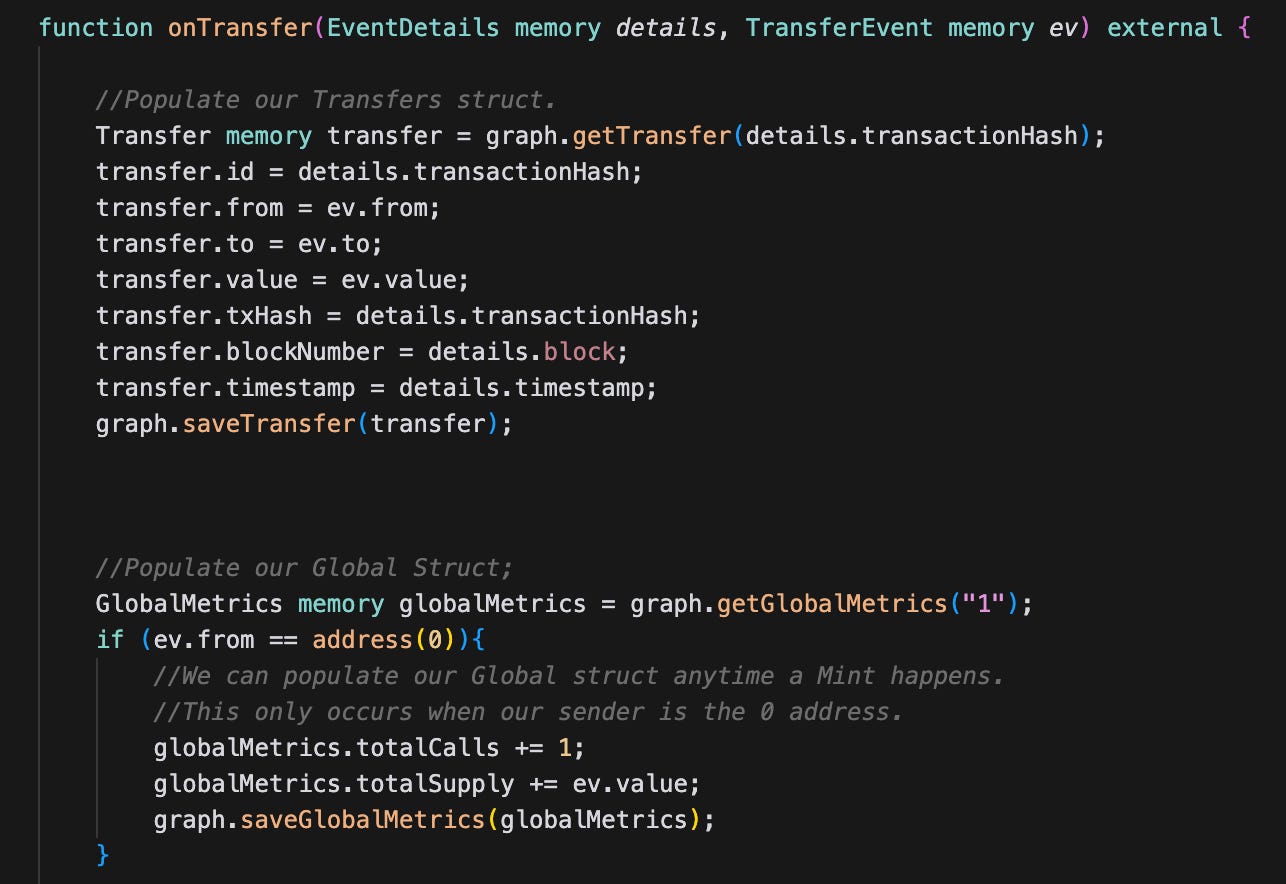
For every transfer event from our contract I will create a transfer object and assign the appropriate values to it from the events and details.
Additionally, I will use the transfer events to populate my GlobalMetrics Schema. Every time a Mint occurs I will update the total supply and number of times the mint function is called.
Sweet. Now all I need to do is compile and deploy our Graph and then we are done. Pretty awesome.
Run `ghost compile` & `ghost deploy` and our indexer is up and running.
If we log in to tryghost.xyz you can see your Ghost Graph deployed and can begin querying it in the GQL Playground provided:
Frontend
We have all the pieces we need now to create our front end. At this point we will be moving back into JavaScript land. However, our entire backend has been written in solidity which has been a huge time saver.
Running `npx create-react-app midwit_frontend` in the root directory of our project will create all the templates.
We will need 4 main pieces of functionality in order to complete our dApp.
Our Contract ABI and Address. (components/Counter.js)
Connect Wallet (components/WalletConnect.js)
Functionality to call the methods on our contract (components/WalletConnect.js)
Connect our GhostGraph api to track our changes over time. (components/DataDisplay.js)
You should be able to cd in to `midwit-frontend` and run `npm run start` and your dApp should be up and running. We won’t run through the code line by line but some of the standard functionality is available to us.
You will see our entire dApp up and running with it connecting to our indexer and our contract: Now, if we increase or decrease our counter - tokens will be transferred, our indexer will watch for the events and update our schemas. We can connect to our GQL endpoints and plot the data we created.
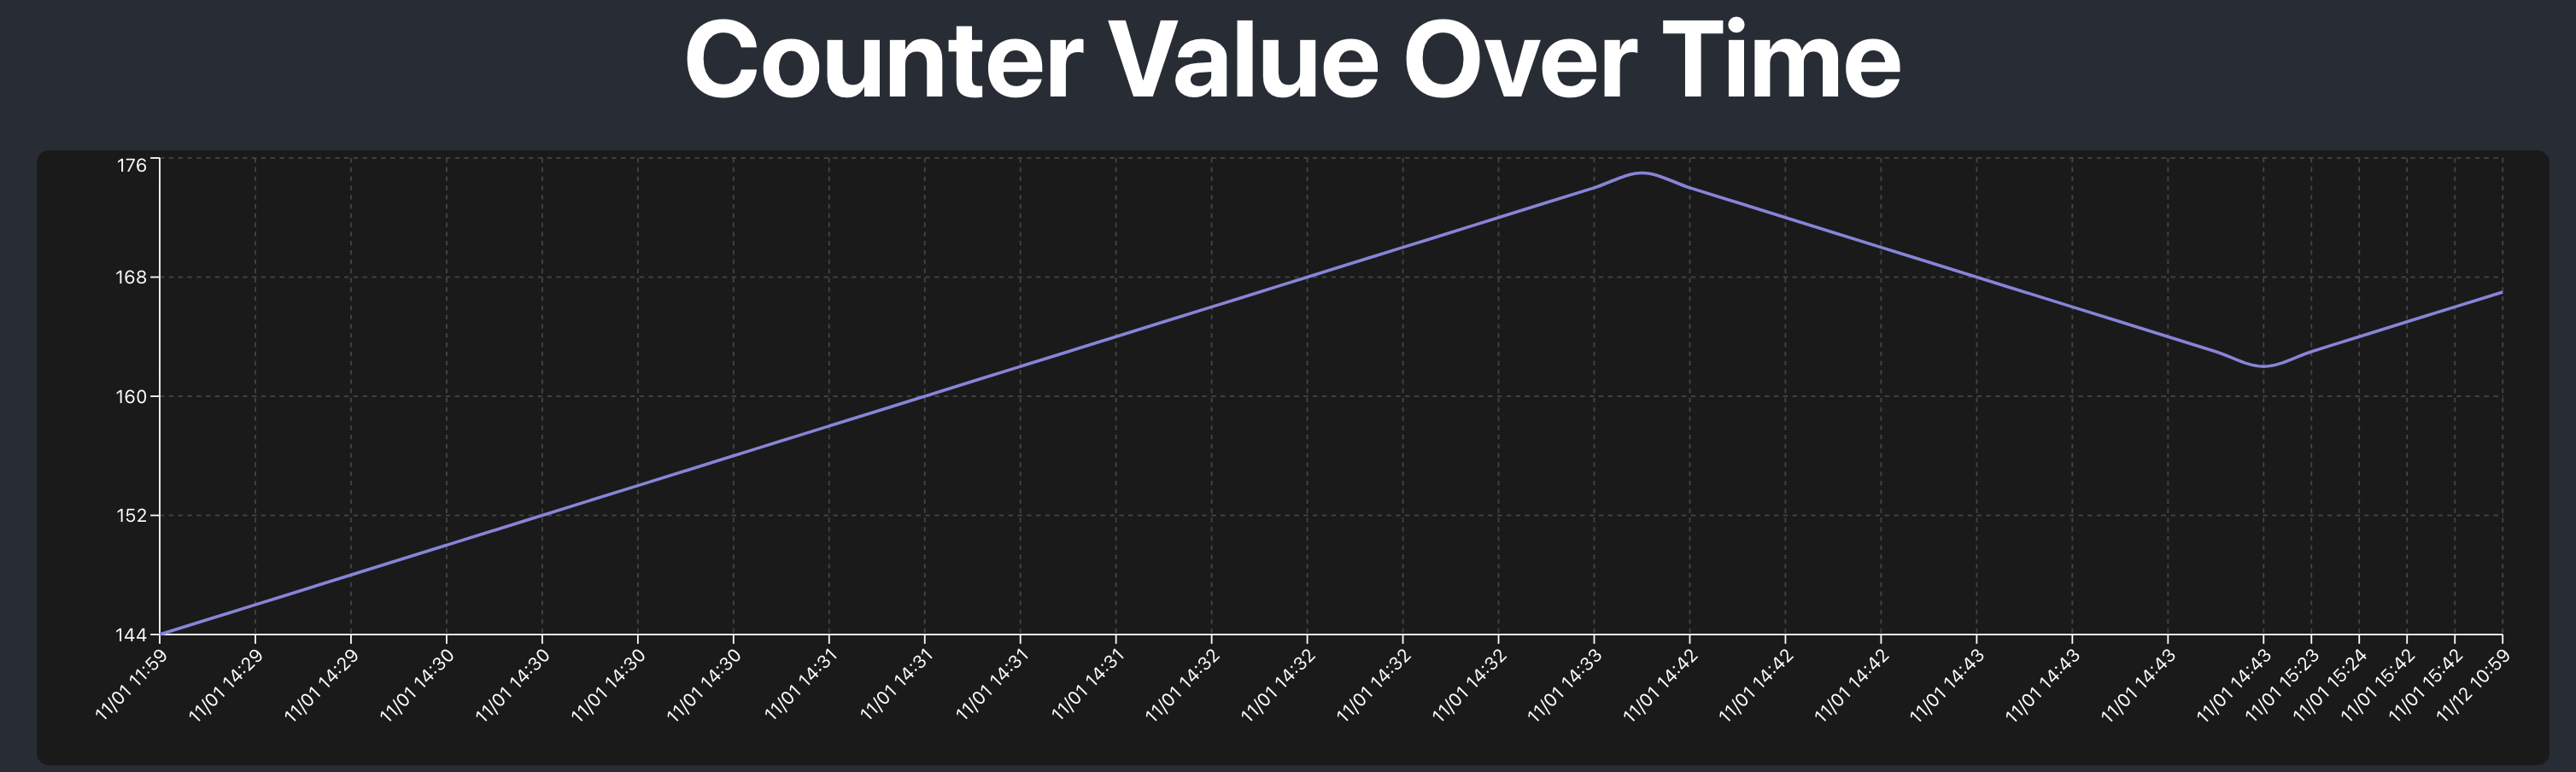
We can see the chart titled Counter Value Over Time shows the change in state within our contract. This is all from our indexer we created. Pretty nice.
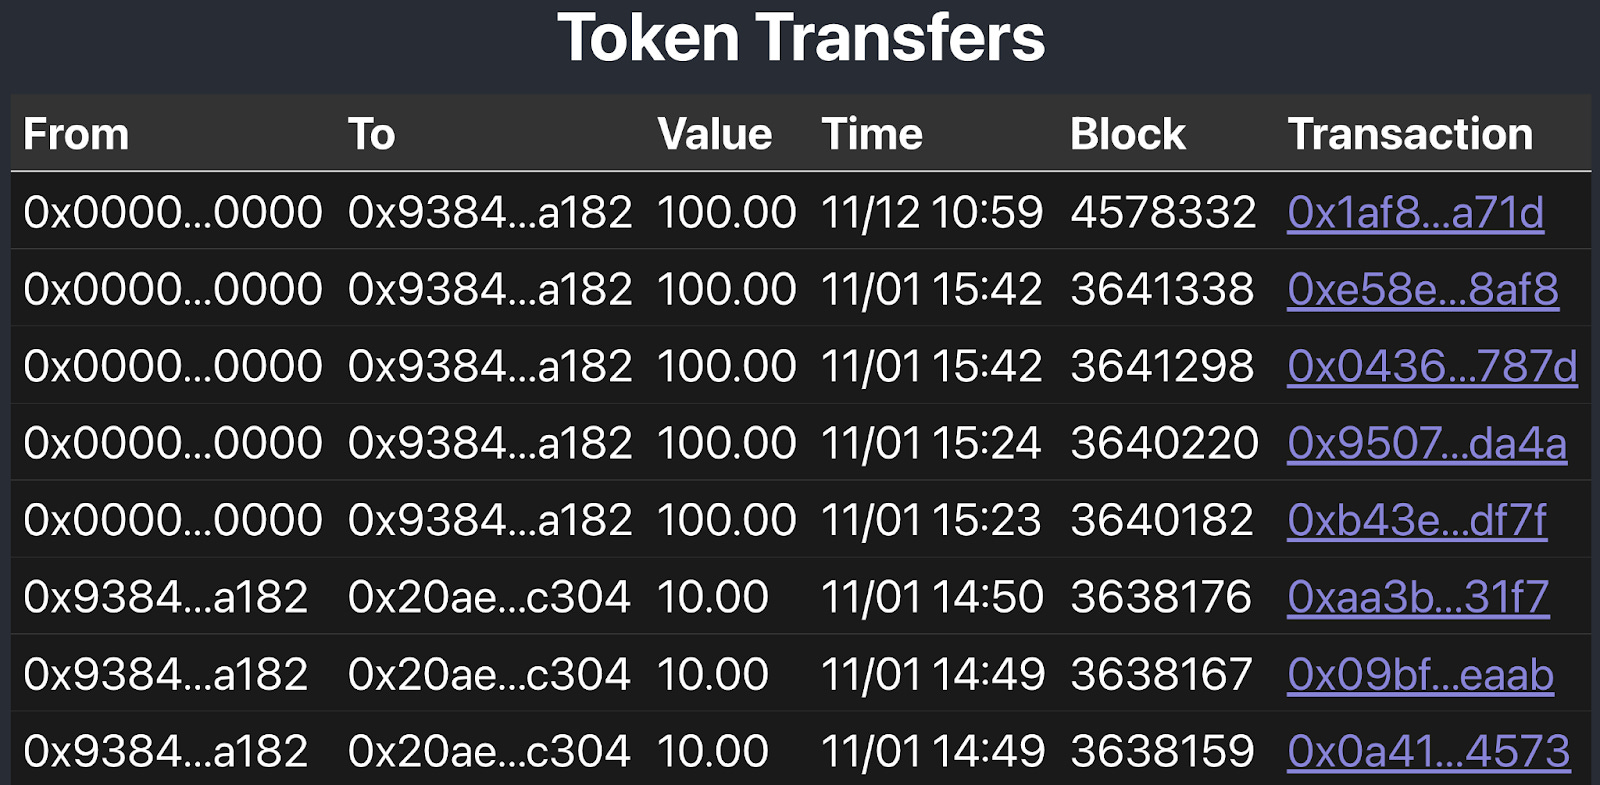
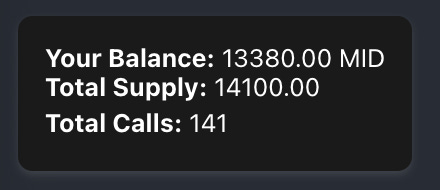
Additionally, we can see all the token transfers that are made on the contract. And even our Global Metrics can be seen.
Summary
I hope this walkthrough was helpful. I have found that writing my indexer in Solidity keeps me closer to my source code and cuts down on time lost to context switching. In my next write up I plan to go deeper on some of the more advanced features of GhostGraph. If you have questions please feel free to connect with me on X and definitely join the Ghost Dev telegram chat for any questions you may have.